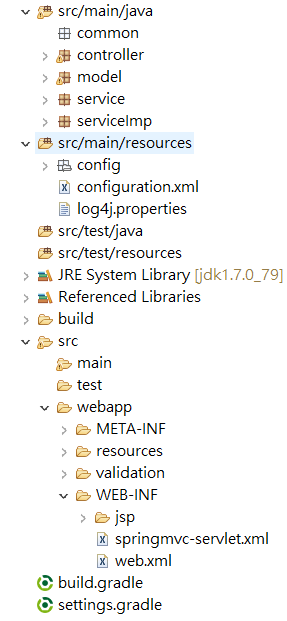
2018年4月17日 星期二

JBOSS AS 7.1 + Gradle Web Application config [Gradle , Spring MVC , Jdk1.7, Jboss AS 7.1,MSSQL]

1.建立gradle專案,將spring所需的一些dependencies 納入

目錄結構如下


2.連結DataSource
我是用sqlserver 2012,在JBOSS根目錄下找到module/com的路徑 
ex:C:\jboss-as-7.1.1.Final\modules\com
在這裡創建以下路徑microsoft\main\
在main資料夾裡放入sqljdbc4.jar 跟跟建立一個module.xml檔,如下圖。


index這個是run成功後會產生的,不用另外建立。

回到standalone.xml 做datasource設定


driver 對應driver name,module要對應稍後會設定的module name

找到<subsystem xmlns="urn:jboss:domain:ee:1.0">
修改為


module name 我猜測是要對應main之前module之後的路徑,\modules\com\microsoft\main 因此
是com.microsoft,之前試了其他都會找不到module,可能在規格書上有寫但我就沒細究了。

3.export war檔 並deploy

   gradle export war檔記得在gralde 裡加上 apply plugin: 'war'
 並加上這段
war {
    from 'src/webapp'
}

他才會把前端所需的東西一起export出來

最後把整包war檔丟到Jboss的deployment , ex: C:\jboss-as-7.1.1.Final\standalone\deployments

啟動server 看到console會有這段 JBAS018210: Registering web context: /accounting

後面加上spring mvc contorller的path 如  http://localhost:8180/accounting/xxcontroller/initPage

就可以把頁面顯示出來了!


JBoss 使用者設定

第一次進入Admin Console的時候會出現設定使用者的畫面


以下為新增使用者步驟
1.cmd指向bin目錄,鍵入指令add-user.bat
2.選擇a先設置Management User
3.Realm的名稱記得設置一樣,至於設置多個Realm的好處跟使用方法我還沒細究
4.輸入帳密 確認帳密後 確認即可
5.設置ApplicationUser 與前面步驟相同,Role設置輸入overlorduser,admin.sramp


輸入http://localhost:8180/console,會跳出輸入帳密的畫面,鍵入後就可以進入管理介面了


看一下console的port是 :10090 ,若有設置eclipse的jboss server,記得檢查這裡


要一致,否則會出現以下錯誤
JBREM000200: Remote connection failed: java.io.IOException: Received an invalid message length of 1195725856

如果帳密忘了,或是想重新設置就來這裡
jboss-as-7.1.1.Final\standalone\configuration
jboss-as-7.1.1.Final\domain\configuration
找兩個properties

mgmt-users.properties
application-users.properties

刪掉這段即可


在Eclipse內加入JBoss server [JBoss AS 7.1 , Eclipse Mars] Add JBoss server in Eclipse

除了將JBoss設置成service,對用Eclipse編譯的人將JBoss設置在IDE中會更方便。
若是第一次安裝,則會要先安裝 Jboss Tools

Selecting JBoss AS, WildFly, & EAP Server Tools will install JBoss Tools.


1.先新增JBoss Server版本,我是用7.1


直接Finish

2.檢查設置port
   在eclipse打開jboss server,查看port設定


3.輸入網址
因為我這裡設置兩台Jboss 所以${jboss.socket.binding.port-offset:100} 這裡是100,一般為0

所以我的port會是8180,輸入網址有通就是成功了


若出現了以下Exception
JBREM000200: Remote connection failed: java.io.IOException: Received an invalid message length of 1195725856

則檢查一下admin console的port是否一致,參考這一篇console設置


將JBoss 設定成windows service

將JBoss設定成windos服務可省下很多時間,以下是步驟,我自己有遇到開啟後馬上shutdown的情形,因此加上一個set java home的錯誤處理,但因為我本身就有設置好環境變數,所以為什麼會有這問題現在也不太清楚。


1.     編輯<JBOSS_ROOT>\binservice.bat (ex: C:\jboss-as-7.1.1.Final\bin)
            記得先備份原檔案

set SVCNAME=JBAS71SVC
set SVCDISP=JBoss Application Server 7.1
set SVCDESC=JBoss Application Server 7.1.1 GA/Platform: Windows x86
set NOPAUSE=Y


2.     JAVA_OPTS註解成 REM set JAVA_OPTS=


3.     取代run.batstandalone.bat

4.     取代run.logstandalone.log

5.     取代call shutdown -S < .s.lock >> shutdown.log 2>&1
            call jboss-cli.bat --connect --command=:shutdown >> shutdown.log 2>&1


6.     儲存service.bat

7.     在此目錄下cmd執行 service.bat install

8.     確認服務已註冊JBoss 


9.     確認<JBOSS_ROOT>\bin\standalone.log有寫入內容

參考網站:

https://coderanch.com/t/470826/application-servers/Start-JBoss-run-bat

https://developer.jboss.org/message/724488

https://developer.jboss.org/message/616629#616629#616629

https://developer.jboss.org/wiki/RunningJBossAS7AsAWindowsService

2018年3月30日 星期五

建立apache sever 2.4 with jboss [windos10] (一)

1.下載網址在此


解壓縮後先看讀我(readme),裡面有下載的需求
Required Redistributable
Binaries built on Visual C++ 2015 x64 do not run on Windows XP or Windows Server 2003
These binaries were built with Visual Studioо 2015 x64, be sure to install the required Visual C++ 2015 x64 Redistributable Package, download from;
https://www.microsoft.com/en-us/download/details.aspx?id=49984 

如果沒有得記得要先下載並安裝,這裡就不贅述

2.將Apache24放在C槽下 C:\Apache24


3.開啟cmd 建議用系統管理員身份執行 C:\Apache24\bin\httpd.exe  -k  install

   安裝完後,打開服務


點選Apache24 然後啟動,如果出現執行中就代表server起起來了,若是出現失敗


目前我遇到的有兩種解決方法:
1. 檢查是否有port佔住80
    在cmd 鍵入 netstat -ano

找到對照的port 與 PID 我們就打開工作管理員--- 詳細資料 去查看

若發現有佔住的port 就看能不能取消服務,若不行,就進入第2種方法(通常比較有效)

2.進入 C:\Apache24\conf 找到 httpd.conf
開啟後,找到Listen 80

把他改成81 或其他想要的port,初始狀況這樣應該就沒問題了!

二、 service起來後開始測試


成功了!! 接下來我們再設置Jboss


2018年3月26日 星期一

onbeforeunload 事件不再支援自訂訊息

前些日子碰到一個需求是離開網頁時要顯示confirm message。測試了一下大概得到以下的資訊:

1.google firefox edge 已停止onbeforeunload的客製化訊息,以免被詐騙所利用,
例如: 『若離開此網頁則會被詛咒啊啊!』

2.事件裡寫的alert與confirm event都不會被觸發。

3.但IE11 目前仍保留此功能


2018年3月14日 星期三

學習Java 的過程會碰上的專有名詞縮寫

剛入程式業界常聽到大量的縮寫,為了在工作溝通上順利,就來作個紀錄

Ajax Asynchronous JavaScript and XML , 非同步的JavaScript與XML技術

API Application Programming Interface, 應用程式介面(接口)

AP: Application  應用程式
            Aplication Server  應用程式伺服器
            Access Point 無線接入點 ORM Object/relational mapping(ORM), 物件關聯對映,簡單來說是ORM工具為中繼資料,利用程式物件去對應儲存在table的資料,可簡化儲存創建與控制資料的程序。


OO object-oriented, object orientation  ,物件導向

JAX-WS Java API for XML Web Services, 用來創造服務的一種API 使用XML

JAX-RS Java API for RESTful Web Services使用REST架構 並用Jersey實現

JSTL JAVA Standard Tag Library, JSP標準標籤庫

JWT :JSON Web Token, 解決傳統token上的資安問題


POJOPlain old Java Objects物件關聯對映,簡單來說是ORM工具為中繼資料,利用程式物件去對應儲存在table的資料,可簡化儲存創建與控制資料的程序。
 old Java Bean with the restrictions removed. Java Beans must meet the following requirements:
  1. Default no-arg constructor
  2. Follow the Bean convention of getFoo (or isFoo for booleans) and setFoo methods for a mutable attribute named foo; leave off the setFoo if foo is immutable.
  3. Must implement java.io.Serializable
JNDI:Java Naming and Directory Interface,命名和目錄接口 ,可使用名稱去取得物件。JNDI is an API used to access the directory and naming services (i.e. the means by which names are associated with objects). The association of a name with an object is called a binding.


2018年2月26日 星期一

幾個spring mvc response與 request的方法

springmvc的設置可去看 關於Spring MVC的一些設定與簡單的example

首先在controller 建立初始頁面

第一個方法 是return jsp 命名的string , response用Model 夾帶參數


@RequestMapping(value="/testing",method=RequestMethod.GET, produces="application/json; charset=utf-8")
public String testing(Model model){

String message = "yo man";

model.addAttribute("message",message);
return "testing";

}

JSP的部份

<form method="POST" action="../SpringMVC/modelTest"  modelAttribute="Accountings">
<center>
<h2>Hello World</h2>
<h2>
${message}
</h2>
/center>
</form>

畫面上就可以看到呈現的字串了


第二個方法使用Ajax傳接值

Controller

@RequestMapping(value="/testingMVC", method = {RequestMethod.GET, RequestMethod.POST})
@ResponseBody
public Map<String,String> showMessage() {
Map<String,String> params = new HashMap<String, String>();
params.put("msg", "hello");
  return params;
}  


JSP

$( document ).ready(function() {
$.ajax({
type:'GET', 
         url: 'testingMVC',
         dataType : 'json',
         success:function(data){
          console.log(data.msg);         
         },
         error:function(e){
          console.log(e);
          
         },                     
});
});


畫面上按F12查看console 即可發現 params.put("msg", "hello");的字串


第三種方法  JSON String
JSP
form裡面加個按鈕
<button type="button" id="testBt" onclick="getVal()">get json string</button>


寫一個ajax函數
function getVal(){
var dataValue = {"msg":"bruno mars"};
$.ajax({
 type:'POST', 
         url: 'getMsg',
         data:JSON.stringify(dataValue),
         contentType : 'application/json; charset=utf-8; text/plain',
         dataType : 'json',
         success:function(data){
          console.log(data);         
         },
         error:function(e){
          console.log(e);           
         },                      
});
}

Controller

@RequestMapping(value="/getMsg",method = {RequestMethod.POST} , produces="application/json; charset=utf-8")
@ResponseBody
public String callVal(@RequestBody Map<String,String> msg) {
System.out.println("params " + msg.values());

JSONObject json = new JSONObject();

json.put("msg", "that's what I like");
  return json.toString();
}

加上@RequestBody annotation 可以取到request的參數


在前端ajax Success裡可取到response data


第四種使用ModelAndView 加上Form表單的modelAttribute 

接下來做submit並導頁的case


JSP
<form method="POST" action="../SpringMVC/modelTest"  modelAttribute="Accountings">

<table>
<tr>
<td>
<button type="button" id="testBt" onclick="getVal()">get json string</button>
</td>
</tr>
<tr>
<td>
<input type="text" id="remarks" name="remarks" value="this is a modelattribue test">
</td>
</tr>
<tr>
<td>
<button type="submit" id='sub'>clickme</button>
</td>
</tr>

</table>
</center>
</form>

再傳一個要導向的jsp頁面
簡單打上要顯示的值
<form method="POST" action="../SpringMVC/modelTest"  modelAttribute="Accountings">
<center>
<h2>
${message.param}
</h2>
</center>
</form>


Model
創一個帳務的model


這邊簡單用remark備註做一個範例


Controller


@RequestMapping(value="/modelTest",method={RequestMethod.POST}, produces="application/json; charset=utf-8")
public ModelAndView testing(@ModelAttribute("Accountings") Accountings accountings,Model model){

String message = accountings.remarks + " 取得帳務備註了!";

model.addAttribute("param",message);

return new ModelAndView("testing2","message",model);
}


點下clickme後 在server可以看到form裡面傳來的值

到View後


就可以得到值了!


2018年2月24日 星期六

關於Spring MVC的一些設定與簡單的example

我是用maven project 因此先設定pom.xml

<!-- https://mvnrepository.com/artifact/org.springframework/spring-context -->
<dependency>
    <groupId>org.springframework</groupId>
    <artifactId>spring-context</artifactId>
    <version>5.0.0.RELEASE</version>
</dependency>
<!-- https://mvnrepository.com/artifact/org.springframework/spring-core -->
<dependency>
    <groupId>org.springframework</groupId>
    <artifactId>spring-core</artifactId>
    <version>5.0.0.RELEASE</version>
</dependency>
    
<!-- https://mvnrepository.com/artifact/org.springframework/spring-web -->
<dependency>
    <groupId>org.springframework</groupId>
    <artifactId>spring-web</artifactId>
    <version>5.0.0.RELEASE</version>
</dependency>
<dependency>
<groupId>org.springframework</groupId>
<artifactId>spring-webmvc</artifactId>
<version>5.0.0.RELEASE</version>
</dependency>

core, context, web以及webmvc


再來先確認springmvc與web.xml 還有jsp的目錄結構

接著先看一下web.xml的內容 加上
       <servlet>
<servlet-name>dispatcherServlet</servlet-name>
<servlet-class>org.springframework.web.servlet.DispatcherServlet</servlet-class>         
        <init-param>
            <param-name>contextConfigLocation</param-name>
            <param-value>
            /WEB-INF/springmvc-servlet.xml
            </param-value>       
        </init-param>
        <load-on-startup>1</load-on-startup>
    </servlet>
    
<servlet-mapping>
<servlet-name>dispatcherServlet</servlet-name>
<url-pattern>/</url-pattern>
</servlet-mapping>

注意url-pattern 為  /

此外若有編碼問題則請參照另一篇: 解決Spring mvc裡JSP亂碼問題


springmvc-servlet.xml 裡的內容

    <mvc:default-servlet-handler/>
  <context:component-scan base-package="controller" />

    <mvc:annotation-driven />
     <!-- 解析頁面的規則  -->  
    <bean id="jspviewResolver"
        class="org.springframework.web.servlet.view.InternalResourceViewResolver">
<!-- 告訴Spring MVC網頁的資料夾 -->
        <property name="prefix" value="/WEB-INF/jsp/"/>   
        <property name="suffix" value=".jsp"/> 
    </bean>   
因為我大部分使用annotation
因此加上 <mvc:annotation-driven /> 以及欲掃描的package
<context:component-scan base-package="controller" />

到Controller裡加上requestmapping以及@Controller的 annotation


下方加上這段,用return String的方法來顯示前端
@RequestMapping(value="/testing",method=RequestMethod.GET)
public String displaying(@RequestParam Map<String,String> params) {

  return "testing";

}

return 的string 為 jsp的命名


這樣就完成了基本 spring mvc的設置了

2018年2月22日 星期四

解決Spring mvc裡JSP亂碼問題

今天撰寫網頁時遇到了JSP亂碼問題,在conroller回傳到view之前是沒有編碼的問題的,但到了view後顯示的卻是問號亂碼如下圖


首先當然先確認前端是否有設定UTF-8

我後端原本就有寫了filter,但還是無法,在網路上找了spring的做法,在web.xml加上以下

  <filter>
    <filter-name>SetCharacterEncoding</filter-name>
        <filter-class>
           org.springframework.web.filter.CharacterEncodingFilter
        </filter-class>
    <init-param>
      <param-name>encoding</param-name>
      <param-value>UTF-8</param-value>
    </init-param>
    <init-param>  
       <param-name>forceEncoding</param-name>  
       <param-value>true</param-value>  
    </init-param>      
  </filter>
<filter-mapping>
    <filter-name>SetCharacterEncoding</filter-name>
    <url-pattern>/*</url-pattern>
</filter-mapping>

但問題仍然沒解決,因為在此設置只會解決request的encoding 即使使用ForceEncoding也無法解決這個case

再google了一下,發現原因


Later found that because the return json in the controller used @ResponseBody, and spring source @ ResponseBody the realization of the class found its default encoding is iso-8859-1, and the project with the encoding for the utf-8, so the Chinese will appear Garbled.


主要是說spring annotation預設編碼為 iso-8859-1 雖然專案設定utf-8 仍然會造成混淆

於是大部分推薦的最終解決方法是加上
@RequestMapping(value="/initValues",method = {RequestMethod.POST} , produces="text/plain")


這樣就沒問題啦~~